Voice Chat (RTC/EOS Voice)
To use custom channels we need to use a TrustedServer to Create/Generate tokens for our clients to securely join the proper channels. This tutorial will show you all the steps required to get your Voice setup.
Voice Server Credentials
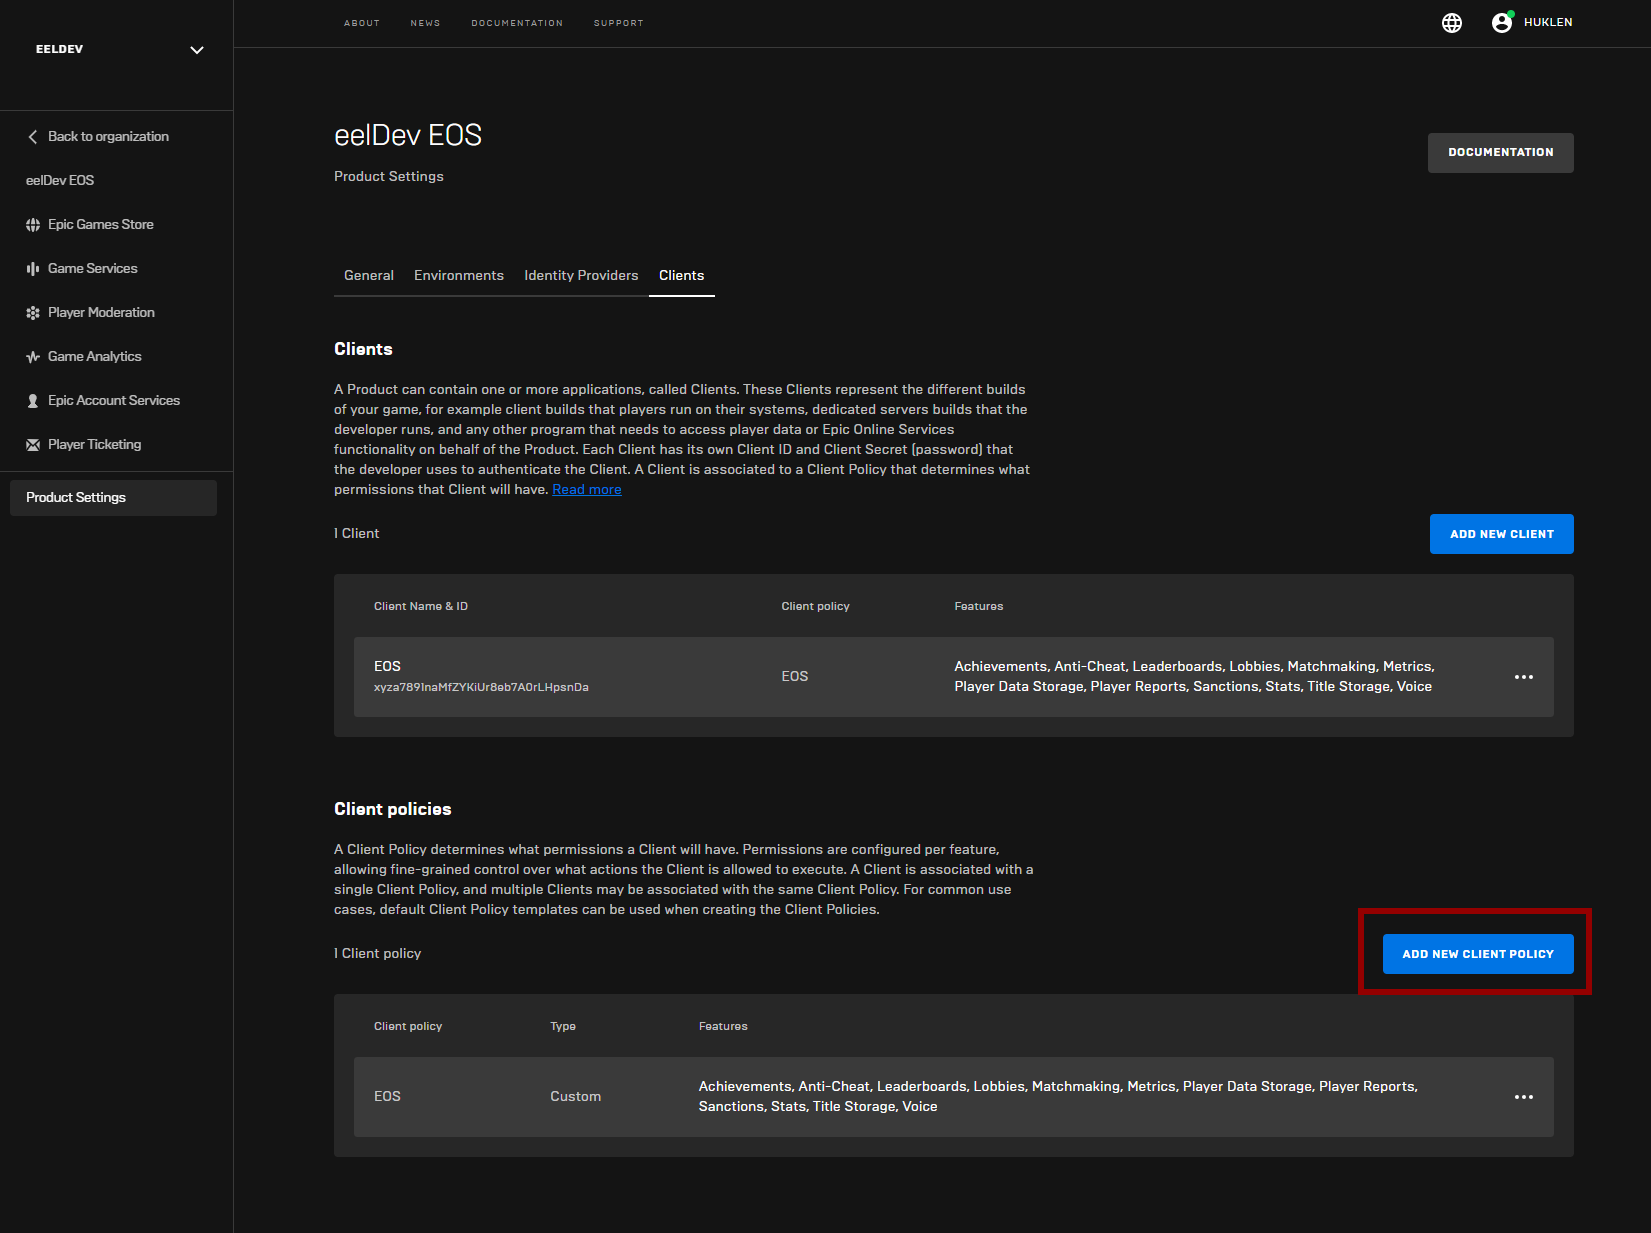
- Let’s start by creating the Voice Server Policy, click on the “Add new client policy” button in your Product Settings
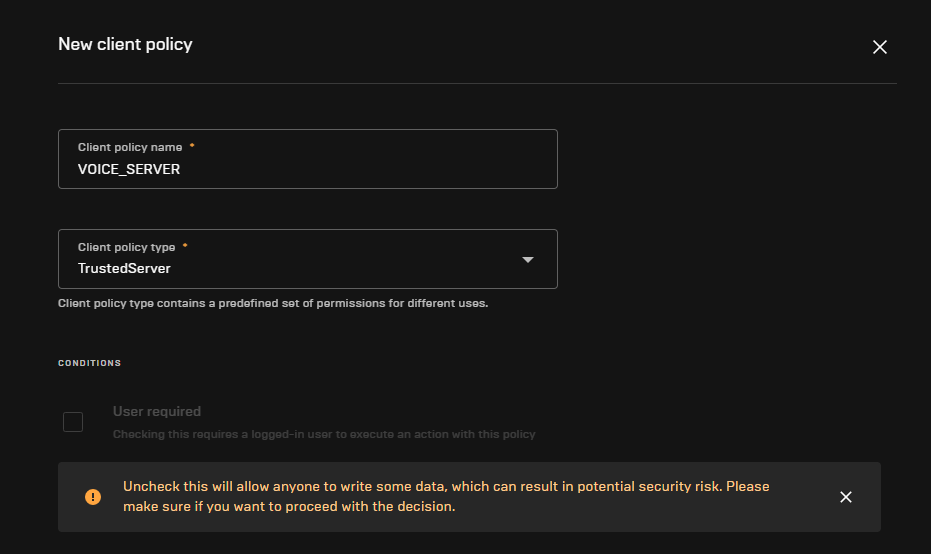
- Give your policy a name and select “TrustedServer” policy type
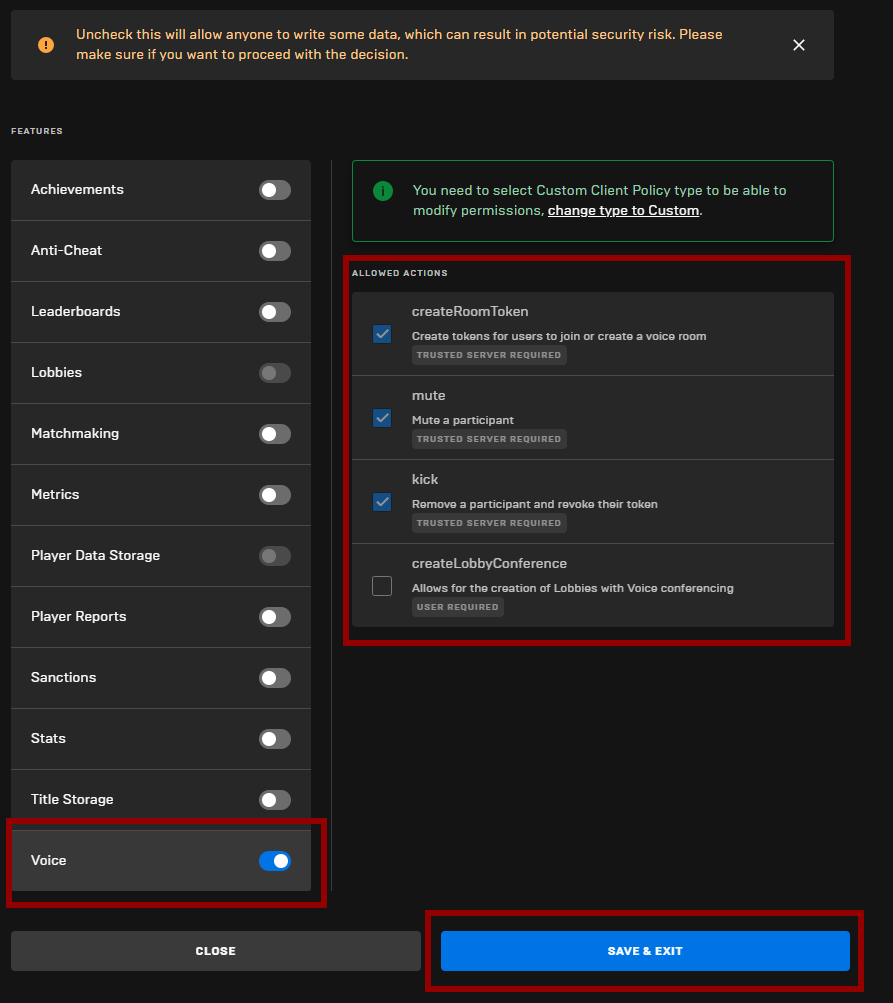
- The only permissions we need to give the server in this demonstration is the Voice Permissions, they should be pre-selected but if they are not then select them accordingly.
Voice Client
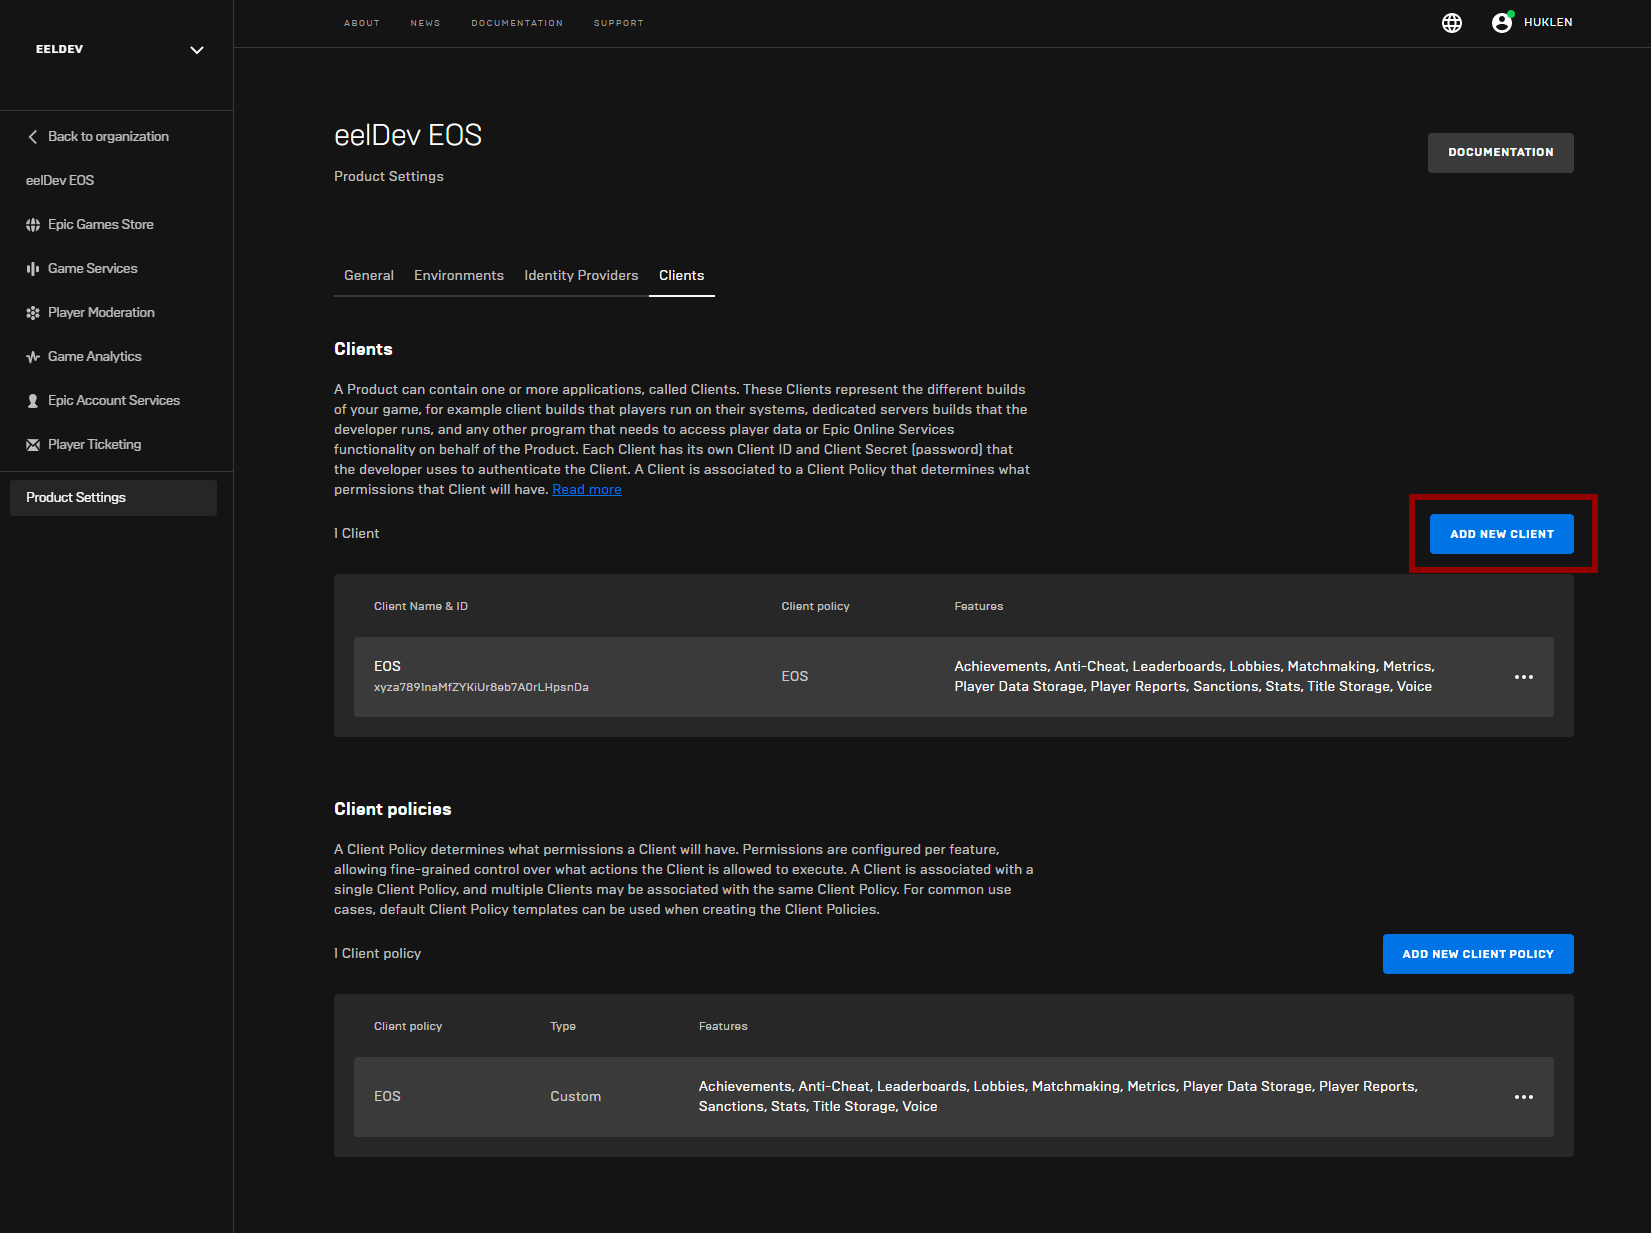
- Next we’re going to create our Client, click on the “Add new client” button
- Give your client a Name and select the Policy we created in the previous step
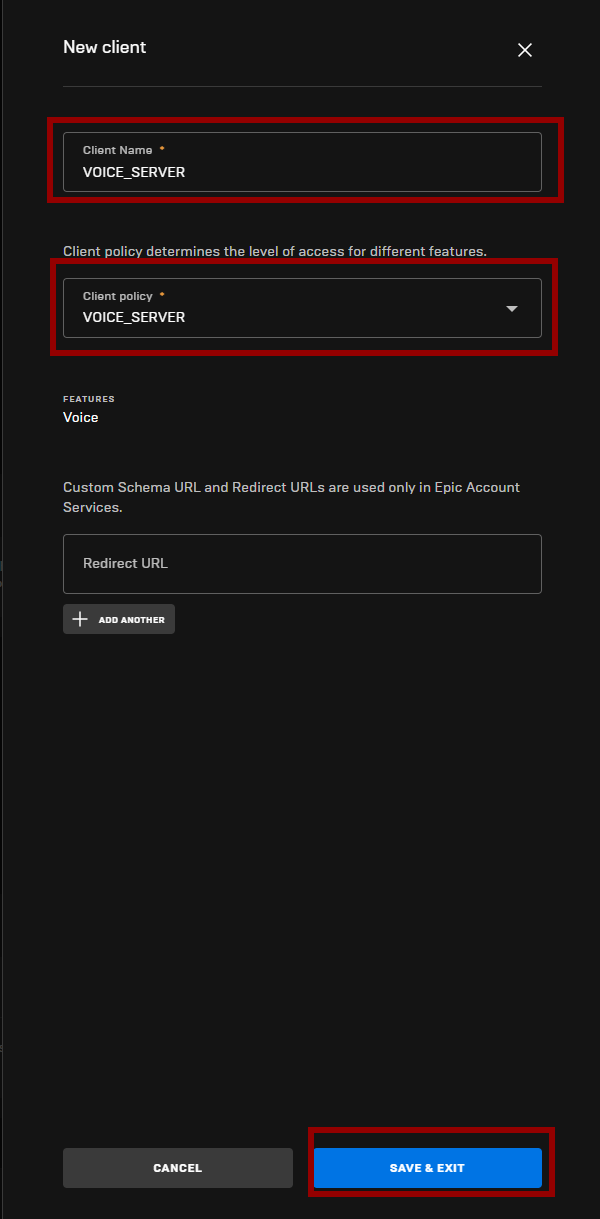
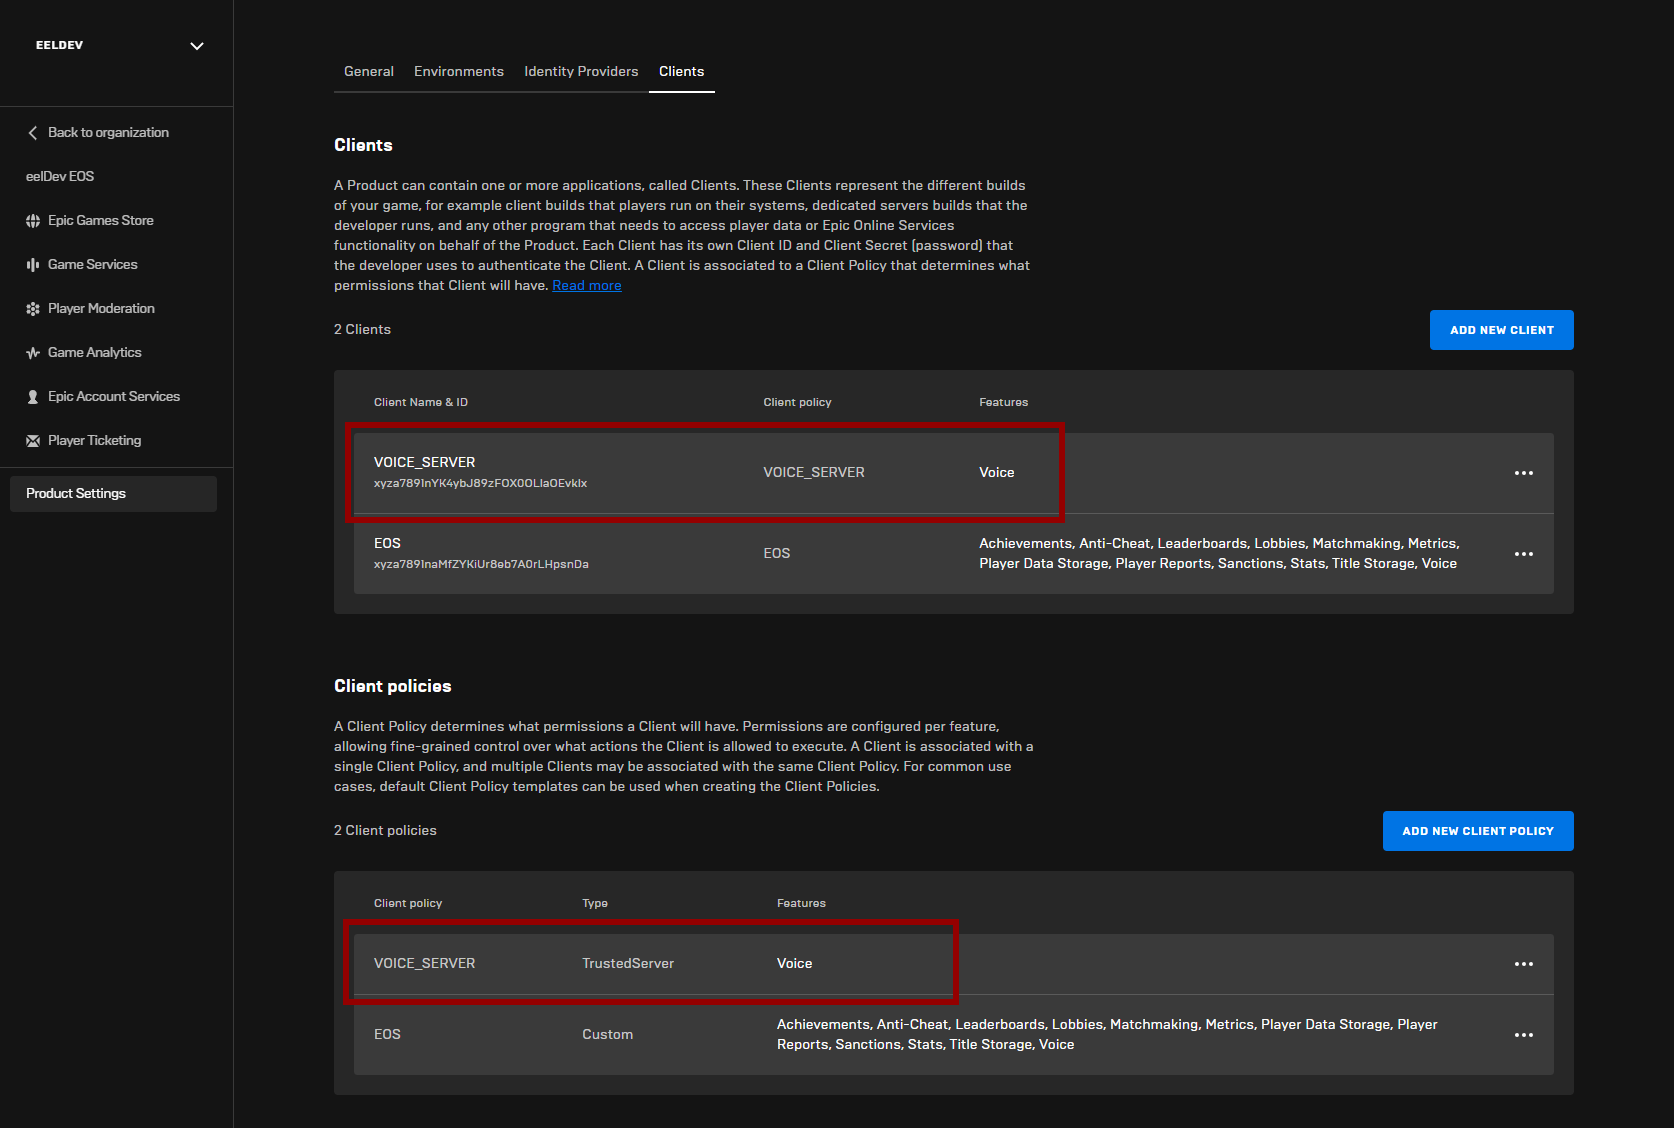
- The finished result!
Implementing Voice in the Game
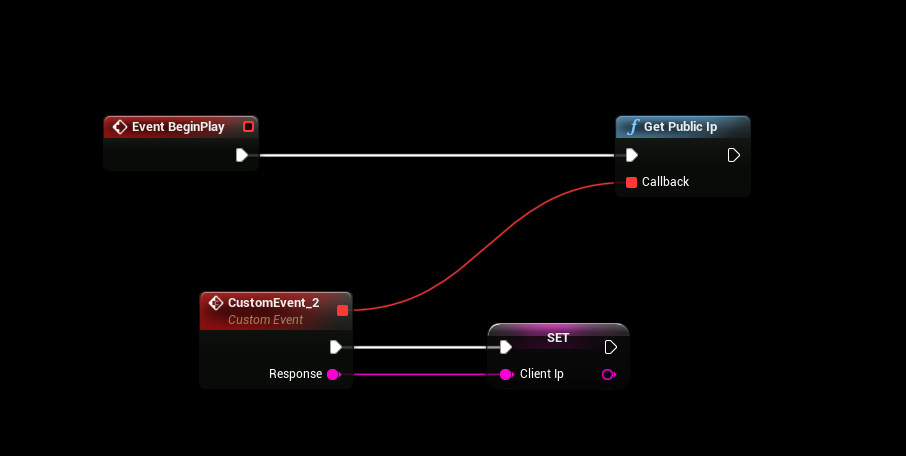
Client Ip (Optional)
- This step is optional, but it’s a good idea to get the Clients Ip Address so that EOS can choose the best server for the client to connect to, GetPublicIp is a utility function provided by EOSCore
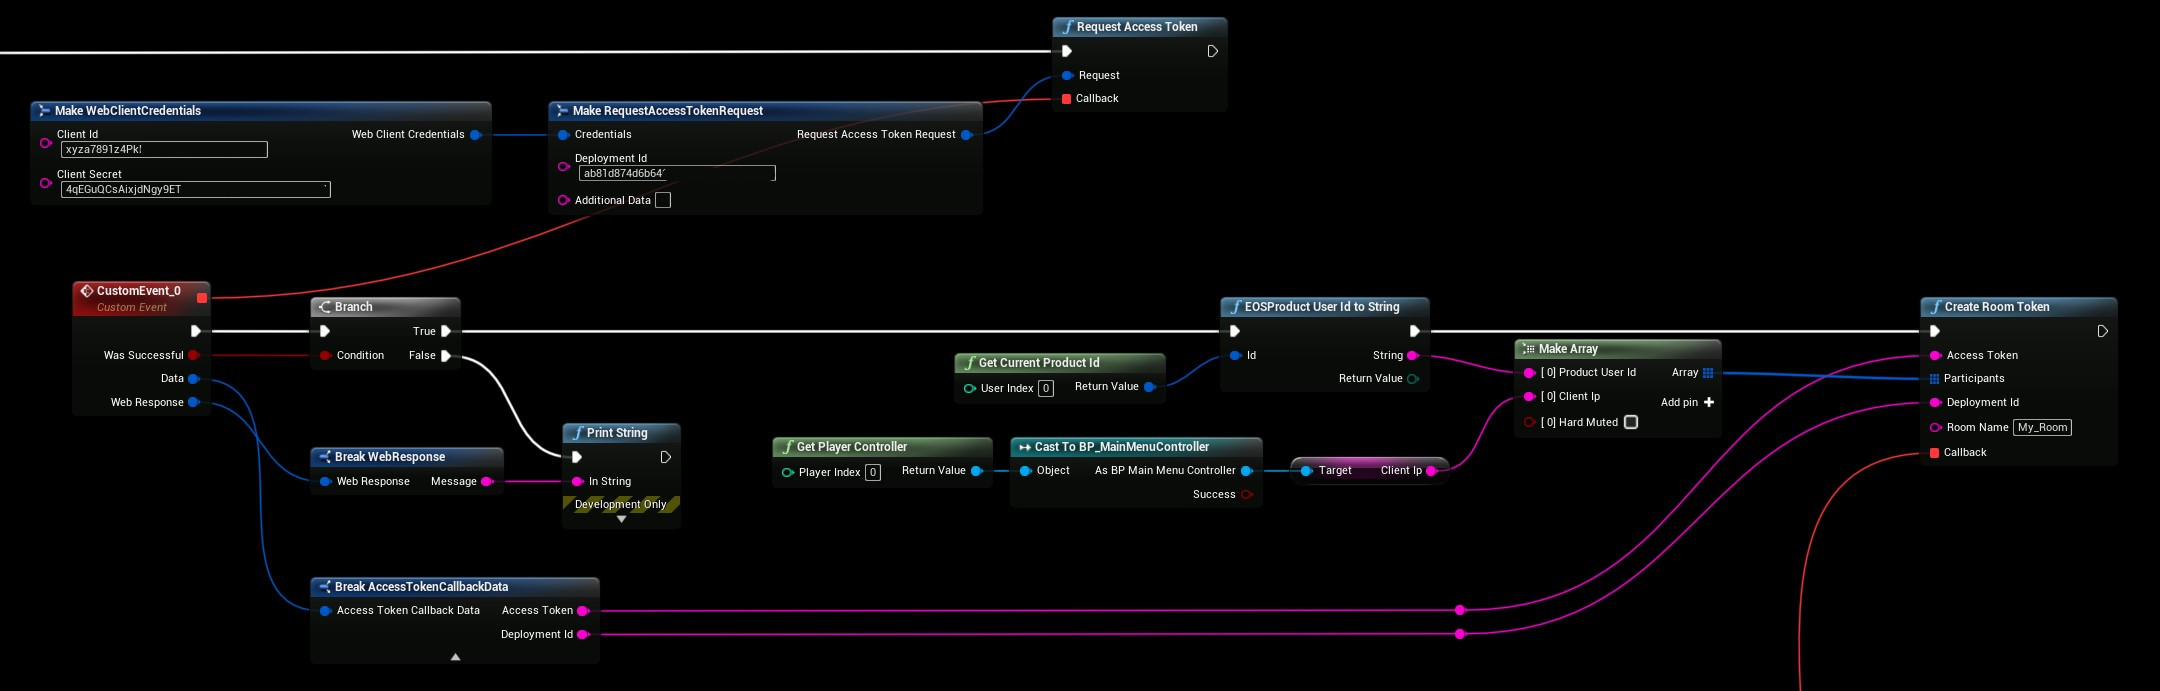
- Use the Credentials that we created earlier for our VOICE_SERVER, these settings should be set like in the example below when calling “RequestAccessToken“
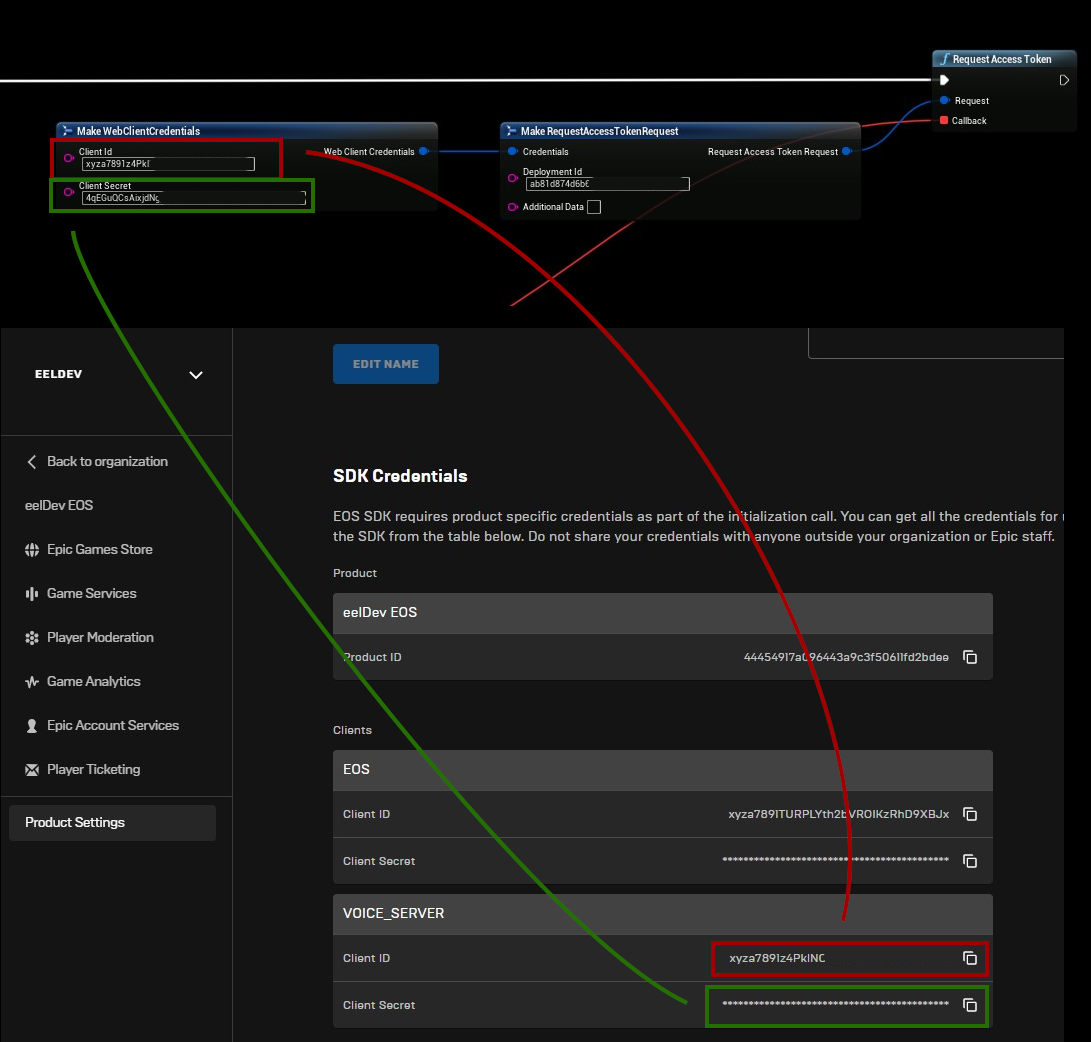
- We request our AccessToken from the Epic Web API and wait for a response, after we receive our AccessToken we can use the Token to generate a Room Token for our Client to use to join the channel
- The last step we finally get to join our room, see the example below:

Conclusion
- Check your Output log and look for any errors if it’s not working
tip
See the Official documentation if you have questions regarding the Voice Service